LoRa SX1278 – Long-range low-power communication
The SX1278 is a long-range transceiver from Semtech that operates in the 433/868/915 MHz ISM bands using LoRa (Long Range) spread-spectrum modulation. It achieves exceptional sensitivity (−148 dBm) and range (up to 15 km line of sight) at low data rates (0.3–50 kbps), making it ideal for IoT sensor networks, remote monitoring, agricultural telemetry, and smart city deployments. Communication is over SPI using the LoRa or RadioHead library.
For this interfacing you need the following components:
- Arduino board × 2 (Uno, Nano, Mega, etc.)
- SX1278 LoRa module (Ra-01, RFM95, or similar) × 2
- ¼-wave antenna (17.3 cm for 433 MHz, 8.2 cm for 868 MHz, or 6.5 cm for 915 MHz)
- Breadboard and jumper wires
- USB cables to connect both Arduinos to your computer\
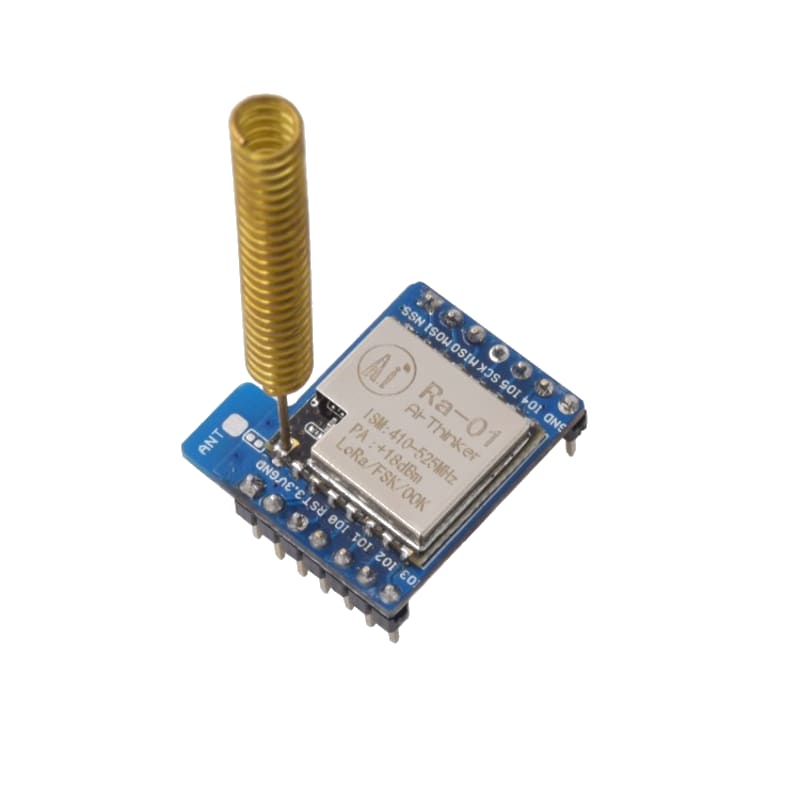
SX1278 LoRa module Module
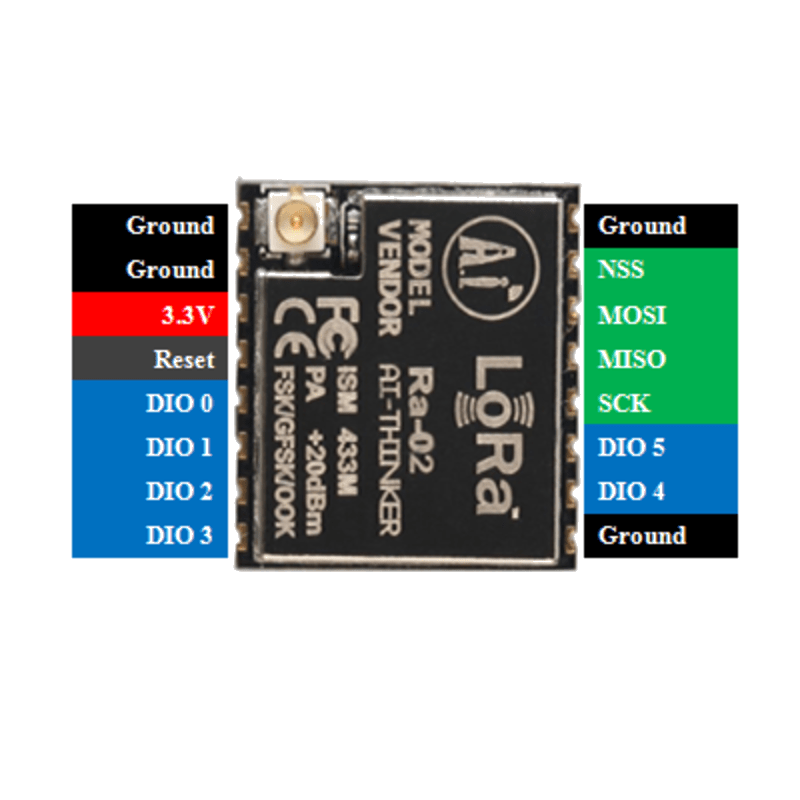
Schematic
Connect the SX1278 module to each Arduino as follows:
SX1278 Module         Arduino
-------------         -------
VCC           -->     3.3V (NOT 5V!)
GND           -->     GND
NSS (CS)      -->     Digital Pin 10
MOSI          -->     Digital Pin 11 (MOSI)
MISO          -->     Digital Pin 12 (MISO)
SCK           -->     Digital Pin 13 (SCK)
RST           -->     Digital Pin 9
DIO0          -->     Digital Pin 2 (interrupt)
DIO1          -->     Not connected (optional)
The SX1278 operates at 3.3V only. Logic pins are also 3.3V — on 5V Arduino boards, use a voltage divider on MOSI and SCK or rely on the module being 5V-tolerant (check your module).
Pin Map
| Module Pin | Name | Arduino Connection |
|---|---|---|
| VCC | Power | 3.3V |
| GND | Ground | GND |
| NSS (CS) | SPI Chip Select | Pin 10 |
| MOSI | SPI Data In | Pin 11 |
| MISO | SPI Data Out | Pin 12 |
| SCK | SPI Clock | Pin 13 |
| RST | Reset | Pin 9 |
| DIO0 | Digital I/O / IRQ | Pin 2 (interrupt) |
| DIO1 | Digital I/O | Not connected |
For Mega 2560: MOSI = Pin 51, MISO = Pin 50, SCK = Pin 52, NSS = Pin 53.
Antenna length
| Frequency | ¼-wave monopole length |
|---|---|
| 433 MHz | 17.3 cm |
| 868 MHz | 8.6 cm |
| 915 MHz | 8.2 cm |
Install necessary Library
Install the LoRa library by Sandeep Mistry via the Library Manager (Tools > Manage Libraries).
Alternatively, using arduino-cli:
arduino-cli lib install "LoRa"
For packet-based communication with addressing and acknowledgements, you can also use the RadioHead library. This tutorial uses the LoRa library by Sandeep Mistry.
Code with complete explanation
This pair of sketches implements a two-way LoRa link. The transmitter sends a counter and sensor value, and the receiver acknowledges each packet.
Transmitter sketch
#include <SPI.h>
#include <LoRa.h>

#define SS_PIN   10
#define RST_PIN  9
#define DIO0_PIN 2

// Frequency (Hz) — set to your region
// 433E6 for 433 MHz, 868E6 for 868 MHz, 915E6 for 915 MHz
#define FREQUENCY 433E6

void setup()
{
  Serial.begin(9600);

  LoRa.setPins(SS_PIN, RST_PIN, DIO0_PIN);

  if (!LoRa.begin(FREQUENCY))
  {
    Serial.println("LoRa init failed. Check wiring.");
    while (1) {}
  }

  // Configure LoRa parameters
  LoRa.setSpreadingFactor(12);       // 6–12 (higher = more range, slower)
  LoRa.setSignalBandwidth(125E3);   // 7.8E3, 10.4E3, 15.6E3, 20.8E3, 31.25E3, 41.7E3, 62.5E3, 125E3, 250E3, 500E3 Hz
  LoRa.setCodingRate4(5);           // 5–8 (higher = more robust, slower)
  LoRa.setTxPower(20);              // 2–20 dBm

  Serial.println("LoRa Transmitter Ready");
}

void loop()
{
  static uint32_t counter = 0;
  counter++;

  float temperature = 22.5 + (counter % 50) / 10.0;

  Serial.print("Sending packet: ");
  Serial.println(counter);

  // Begin LoRa packet
  LoRa.beginPacket();
  LoRa.print("P:");
  LoRa.print(counter);
  LoRa.print(" T:");
  LoRa.print(temperature, 1);
  LoRa.endPacket();

  delay(5000);
}
Receiver sketch
#include <SPI.h>
#include <LoRa.h>

#define SS_PIN   10
#define RST_PIN  9
#define DIO0_PIN 2

#define FREQUENCY 433E6

void setup()
{
  Serial.begin(9600);

  LoRa.setPins(SS_PIN, RST_PIN, DIO0_PIN);

  if (!LoRa.begin(FREQUENCY))
  {
    Serial.println("LoRa init failed. Check wiring.");
    while (1) {}
  }

  LoRa.setSpreadingFactor(12);
  LoRa.setSignalBandwidth(125E3);
  LoRa.setCodingRate4(5);

  Serial.println("LoRa Receiver Ready");
}

void loop()
{
  int packetSize = LoRa.parsePacket();

  if (packetSize)
  {
    Serial.print("Received packet: ");

    while (LoRa.available())
    {
      Serial.print((char)LoRa.read());
    }

    // Print RSSI and SNR
    Serial.print("  RSSI: ");
    Serial.print(LoRa.packetRssi());
    Serial.print(" dBm  SNR: ");
    Serial.print(LoRa.packetSnr());
    Serial.println(" dB");
  }
}
Code breakdown
#include <LoRa.h>— includes the LoRa library by Sandeep Mistry.LoRa.setPins(NSS, RST, DIO0)— configures the SPI chip select, reset, and interrupt pins.LoRa.begin(frequency)— initialises the LoRa modem. Returnsfalseif the module is not detected.LoRa.setSpreadingFactor(sf)— sets the spreading factor (6–12). Higher values increase range but reduce data rate. SF12 gives the longest range (~15 km) at ~300 bps.LoRa.setSignalBandwidth(bw)— sets the bandwidth in Hz. Narrower bandwidth = better sensitivity = longer range, but more susceptible to frequency drift.LoRa.setCodingRate4(denominator)— sets the forward error correction rate (5–8). Higher values are more robust but increase overhead.LoRa.setTxPower(dbm)— sets the transmit power in dBm (2–20). Check local regulations for maximum allowed power.LoRa.beginPacket()— starts a new LoRa packet.LoRa.print()/LoRa.write()— adds data to the packet (same API asSerial.print).LoRa.endPacket()— finalises and transmits the packet. Blocks until transmission completes.LoRa.parsePacket()— returns the size of a received packet, or 0 if none is available. Non-blocking.LoRa.available()— returns the number of bytes available to read from the received packet.LoRa.read()— reads one byte from the received packet.LoRa.packetRssi()— returns the RSSI (received signal strength) of the last packet in dBm.LoRa.packetSnr()— returns the signal-to-noise ratio of the last packet in dB.
LoRa parameter trade-offs
| Parameter | Longer Range | Higher Data Rate |
|---|---|---|
| Spreading Factor | Higher (SF12) | Lower (SF6) |
| Bandwidth | Narrower (62.5 kHz) | Wider (250–500 kHz) |
| Coding Rate | Higher (8) | Lower (5) |
| TX Power | Higher (20 dBm) | Lower (2 dBm) |
Example for maximum range: SF12 + 62.5 kHz + CR8 + 20 dBm ≈ 300 bps, 10–15 km.
Example for high speed: SF7 + 500 kHz + CR5 + 10 dBm ≈ 50 kbps, 1–2 km.
Using the RadioHead library (alternative)
#include <RH_RF95.h>

RH_RF95 rf95(10, 9); // NSS, RST

void setup()
{
  rf95.init();
  rf95.setFrequency(433.0);
  rf95.setTxPower(20);
}

void loop()
{
  // Transmitter
  uint8_t data[] = "Hello LoRa";
  rf95.send(data, sizeof(data));
  rf95.waitPacketSent();
  delay(5000);

  // Receiver
  uint8_t buf[RH_RF95_MAX_MESSAGE_LEN];
  uint8_t len = sizeof(buf);

  if (rf95.recv(buf, &len))
  {
    Serial.println((char *)buf);
  }
}
Steps to perform this interfacing
- Connect each SX1278 LoRa module to its Arduino as shown in the schematic. Ensure VCC goes to 3.3V, not 5V.
- Solder (or connect) a whip antenna of the correct length for your frequency band.
- Install the LoRa library by Sandeep Mistry via the Library Manager.
- Upload the transmitter sketch to the first Arduino.
- Upload the receiver sketch to the second Arduino.
- Open the Serial Monitor on the receiver (9600 baud).
- Power both Arduinos — the receiver should print received packets every 5 seconds, with RSSI and SNR values.
- Test range by moving the transmitter farther away. The RSSI should decrease as distance increases.
Caution
- 3.3V only: The SX1278 is a 3.3V device. Connecting VCC to 5V will destroy the module. The logic pins (NSS, MOSI, SCK, RST) are also 3.3V-only. On 5V Arduino boards, add 1 kΩ / 2.2 kΩ voltage dividers on MOSI and SCK, or use a logic level shifter. Many cheap modules are marginally 5V-tolerant but this is not guaranteed.
- Antenna required: Never transmit without an antenna connected — the RF power amplifier can be damaged by the reflected power. Always connect a 50 Ω antenna matched to your operating frequency.
- Duty cycle and power limits: LoRa operates in license-free ISM bands that have regulatory limits on duty cycle and transmit power. In the EU (868 MHz): max 1% duty cycle for most channels, max 25 mW ERP for some channels. In the US (915 MHz): max 1 W ERP with frequency hopping or limited transmit time. Check your local regulations before deploying.
- Frequency selection: Set the frequency to match your LoRa module and local regulations. Common values: 433E6 (433 MHz, Asia/EU), 868E6 (868 MHz, EU), 915E6 (915 MHz, US/Australia). Both transmitter and receiver must use the same frequency.
- Spreading factor vs. data rate: A higher spreading factor (SF12) gives up to 10 dB more link budget (longer range) but reduces the data rate to ~300 bps. A packet of 64 bytes takes approximately 1.7 seconds at SF12 / 125 kHz — plan your packet size and retry timing accordingly.
- Interference: LoRa is resistant to narrowband interference due to its spread-spectrum nature, but co-located LoRa transmitters on the same frequency will collide. Use different spreading factors or frequencies for different networks in the same area. LoRaWAN networks use adaptive data rate (ADR) and channel hopping to mitigate this.
- Power consumption: The SX1278 draws approximately 1.6 µA in sleep mode, 10–20 mA in receive mode, and up to 120 mA at 20 dBm transmit power. For battery-powered nodes, use duty-cycled operation: wake, transmit, sleep.